
Several teams of developers can create and consolidate together documentation for their program's initiative using markdown.
The documentation project will contain a collection of ".md" files and associated artifacts (images, videos, etc.) that will be rendered to html files and published on an internal site.
The web site and documentation will look very professional, having the text formatted in various ways (Table of Contents, lists, bullet points, etc.), and include diagrams (sequence, graph, Gantt charts, journeys, etc.), images, videos, embedded Swagger Editor and so on.
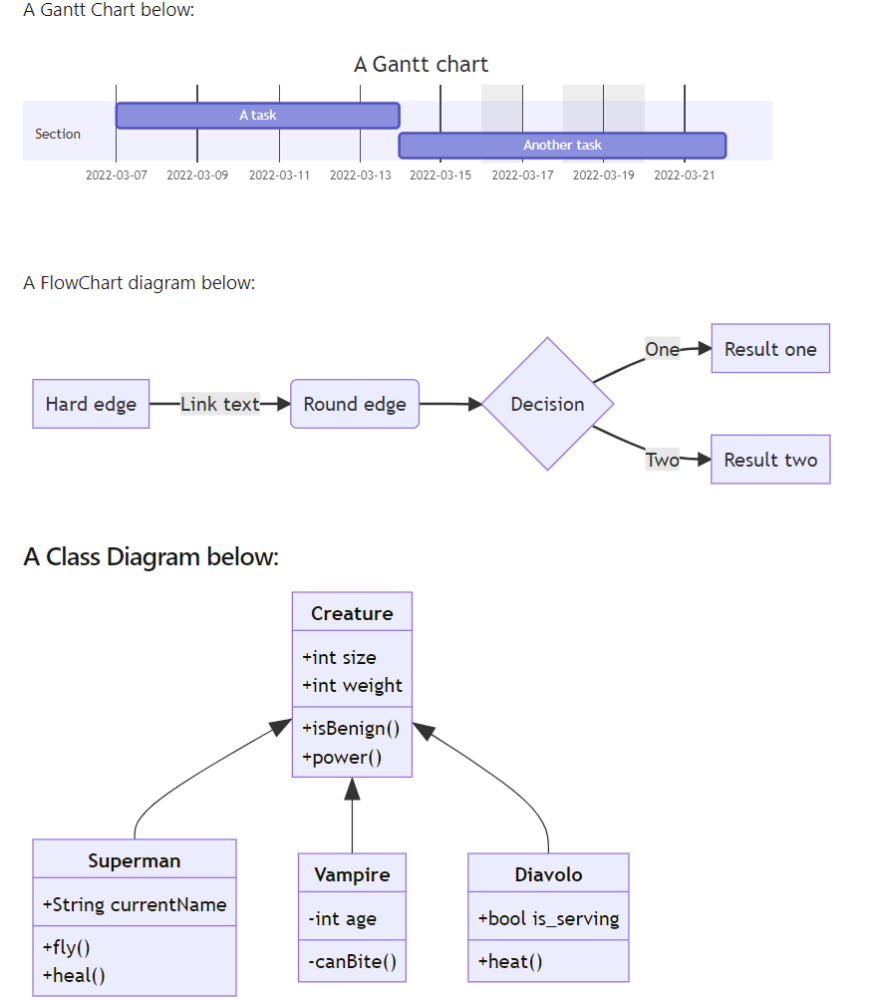
Diagrams enclosed in the documentation
The following links explains how to write and format the text and add diagrams, images, and videos:
Using the guidance from above you can create a readme.md file and open it with VS Code and see the file's content and a preview of its rendered image at run-time, side-by-side.
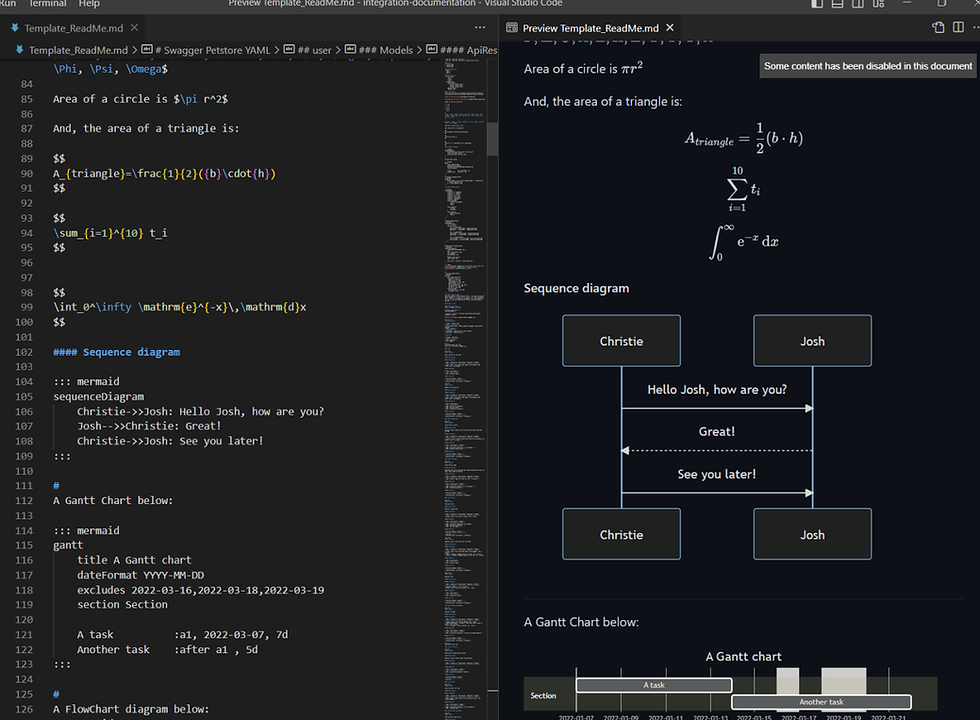
VS Cose md file with preview side-by-side
There are several tools available to build the markdown files/project and build the html static site. You can find details at this link:
Each of these tools uses a different runtime to write the project (Ruby, Python, etc.) and build the local environment / site.
Each tool (MkDocs, Docusaurus, ReadTheDocs/Sphinx, Jekyll, etc.) uses a different UI format (theme) to display the content.
I have chosen to work using Ruby and Jekyll to create and build the documentation project.
The work I have done it is following a series of articles which starts at this link:
https://gunnarpeipman.com/jekyll-azure-devops-static-blog/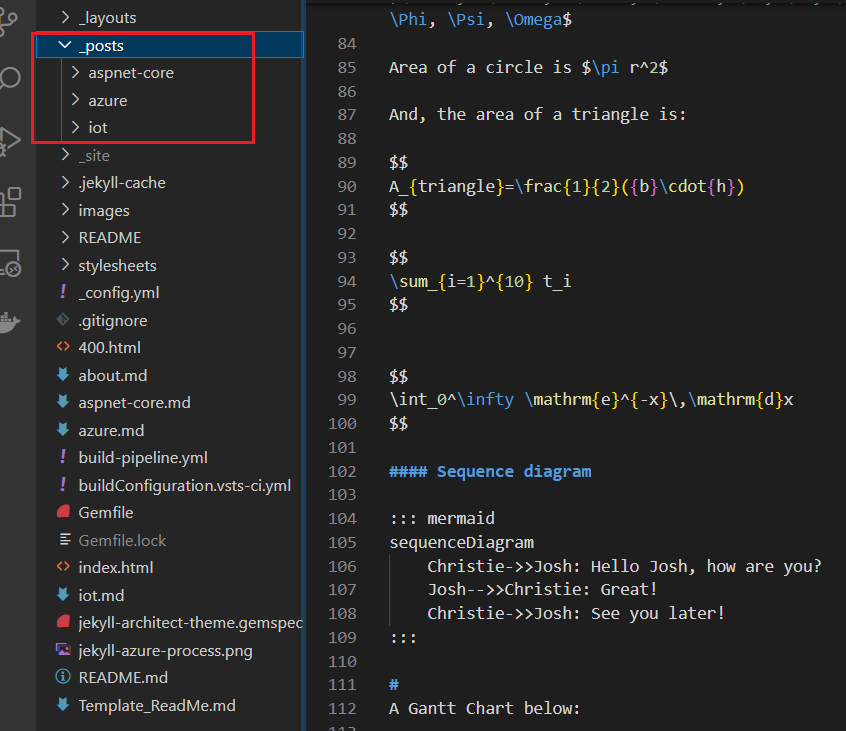
The documentation project's structure

Documentation web site
To run the site locally, you must install Ruby and Jekyll as described at this link.
https://jekyllrb.com/docs/installation/windows/https://jekyllrb.com/docs/step-by-step/01-setup/With Ruby installed, install Jekyll from the terminal: gem install jekyll bundler
Open the project in VS Code and execute the following commands:
Jekyll build
and
Jekyll serve
and the web site will be started locally at this location: http://localhost:4000”.
The main documentation files (having the extension "md") are located in the “_posts” folder. You can create a new sub-folder under the “posts” folder and add your documentation file there.
The newly added file will be displayed on the main page having the title as it is set up at the top of the file – see below:

Change the title of the file on top of the page
You can open the “_layouts\default.html” file and see from where the other elements are incorporated into the main page.
The changes you are making to this project will be built automatically and the web site refreshed while the server is up and running.
The documentation can be deployed as an Azure Wiki, as an Azure static web site or as an HTML site stored in an App Service.
First, create your pipeline to build your project.
Create a pipeline by selecting the “Existing Azure Pipelines YAML file”.
Use the yaml file from this link:
https://gunnarpeipman.com/jekyll-azure-devops-build-pipeline/If you review the file, you will see that it does the following:
Run a build agent on Ubuntu.
Install the runtime for Ruby and Jekyll.
- script:

    gem install jekyll bundler

    bundle install --retry=3 --jobs=4|
Build the project.
- script:

    bundle install

    jekyll build|
Publish the build artifact with the name of “site”.
Secondly, create the release for deploying the content of the site to an Azure static web site or an Azure App Service.

Documentation deployed as Azure Wiki
Details about deploying the documentation as a static web site in an Azure Storage account can be found here:
https://gunnarpeipman.com/jekyll-azure-static-website/The command to upload the files to the azure static website is displayed below:
az storage blob upload-batch --account-name mydocumentationsite -s ./ -d '$web'.
Once this process it is completed, the developers can add new files into the documentation and upon checking the file in the repo and the file being approved, the CI/CD process will update the documentation web site automatically.
As a note, Swagger editor can be embedded in the documentation and the API tested from inside the documentation.
Details below:
https://idratherbewriting.com/learnapidoc/pubapis_swagger_demo.html
Comentários